Notion Destination
Documentation on using Finicom's Notion destination to sync bank account transactions into Notion databases.
Introduction
Finicom’s Notion destination lets you sync financial transactions directly into a Notion database in your workspace, making it easy for your team to create financial reports right in Notion!
Check out our Notion Integration in Notion's integration gallery here.
Watch How To Connect Notion
Setting Up a Notion Destination
- Go to your organization’s Destinations page.
- Click "Add Destination."
- Select "Notion."
- Ensure your Notion workspace is connected to Finicom. If not, select "Add a new Notion Workspace" in the "Notion Workspace" dropdown.
- Follow Notion’s app connection flow to connect your workspace to Finicom.
- Tip: Use our template to set up a database with the necessary properties.
- Complete adding the details for your Notion destination, including the source and database you’d like to sync.
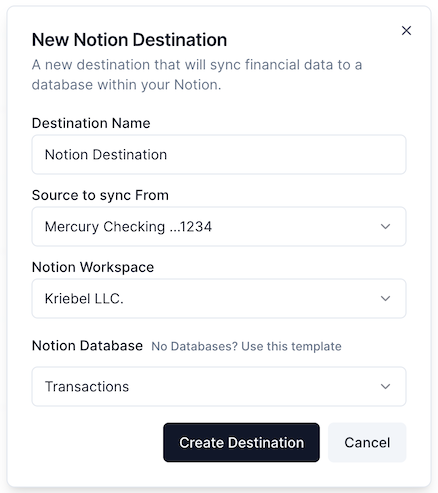
Note: Only compatible databases with the required fields are displayed for selection.
How It Works
- New Transactions: Each new transaction will create a new page in the Notion database.
- Modified Transactions: When a transaction status changes (e.g., from pending to posted), the corresponding page updates. If the transaction doesn’t exist in the database, a new page will be created.
- Removed Transactions: Voided transactions will archive the corresponding page.
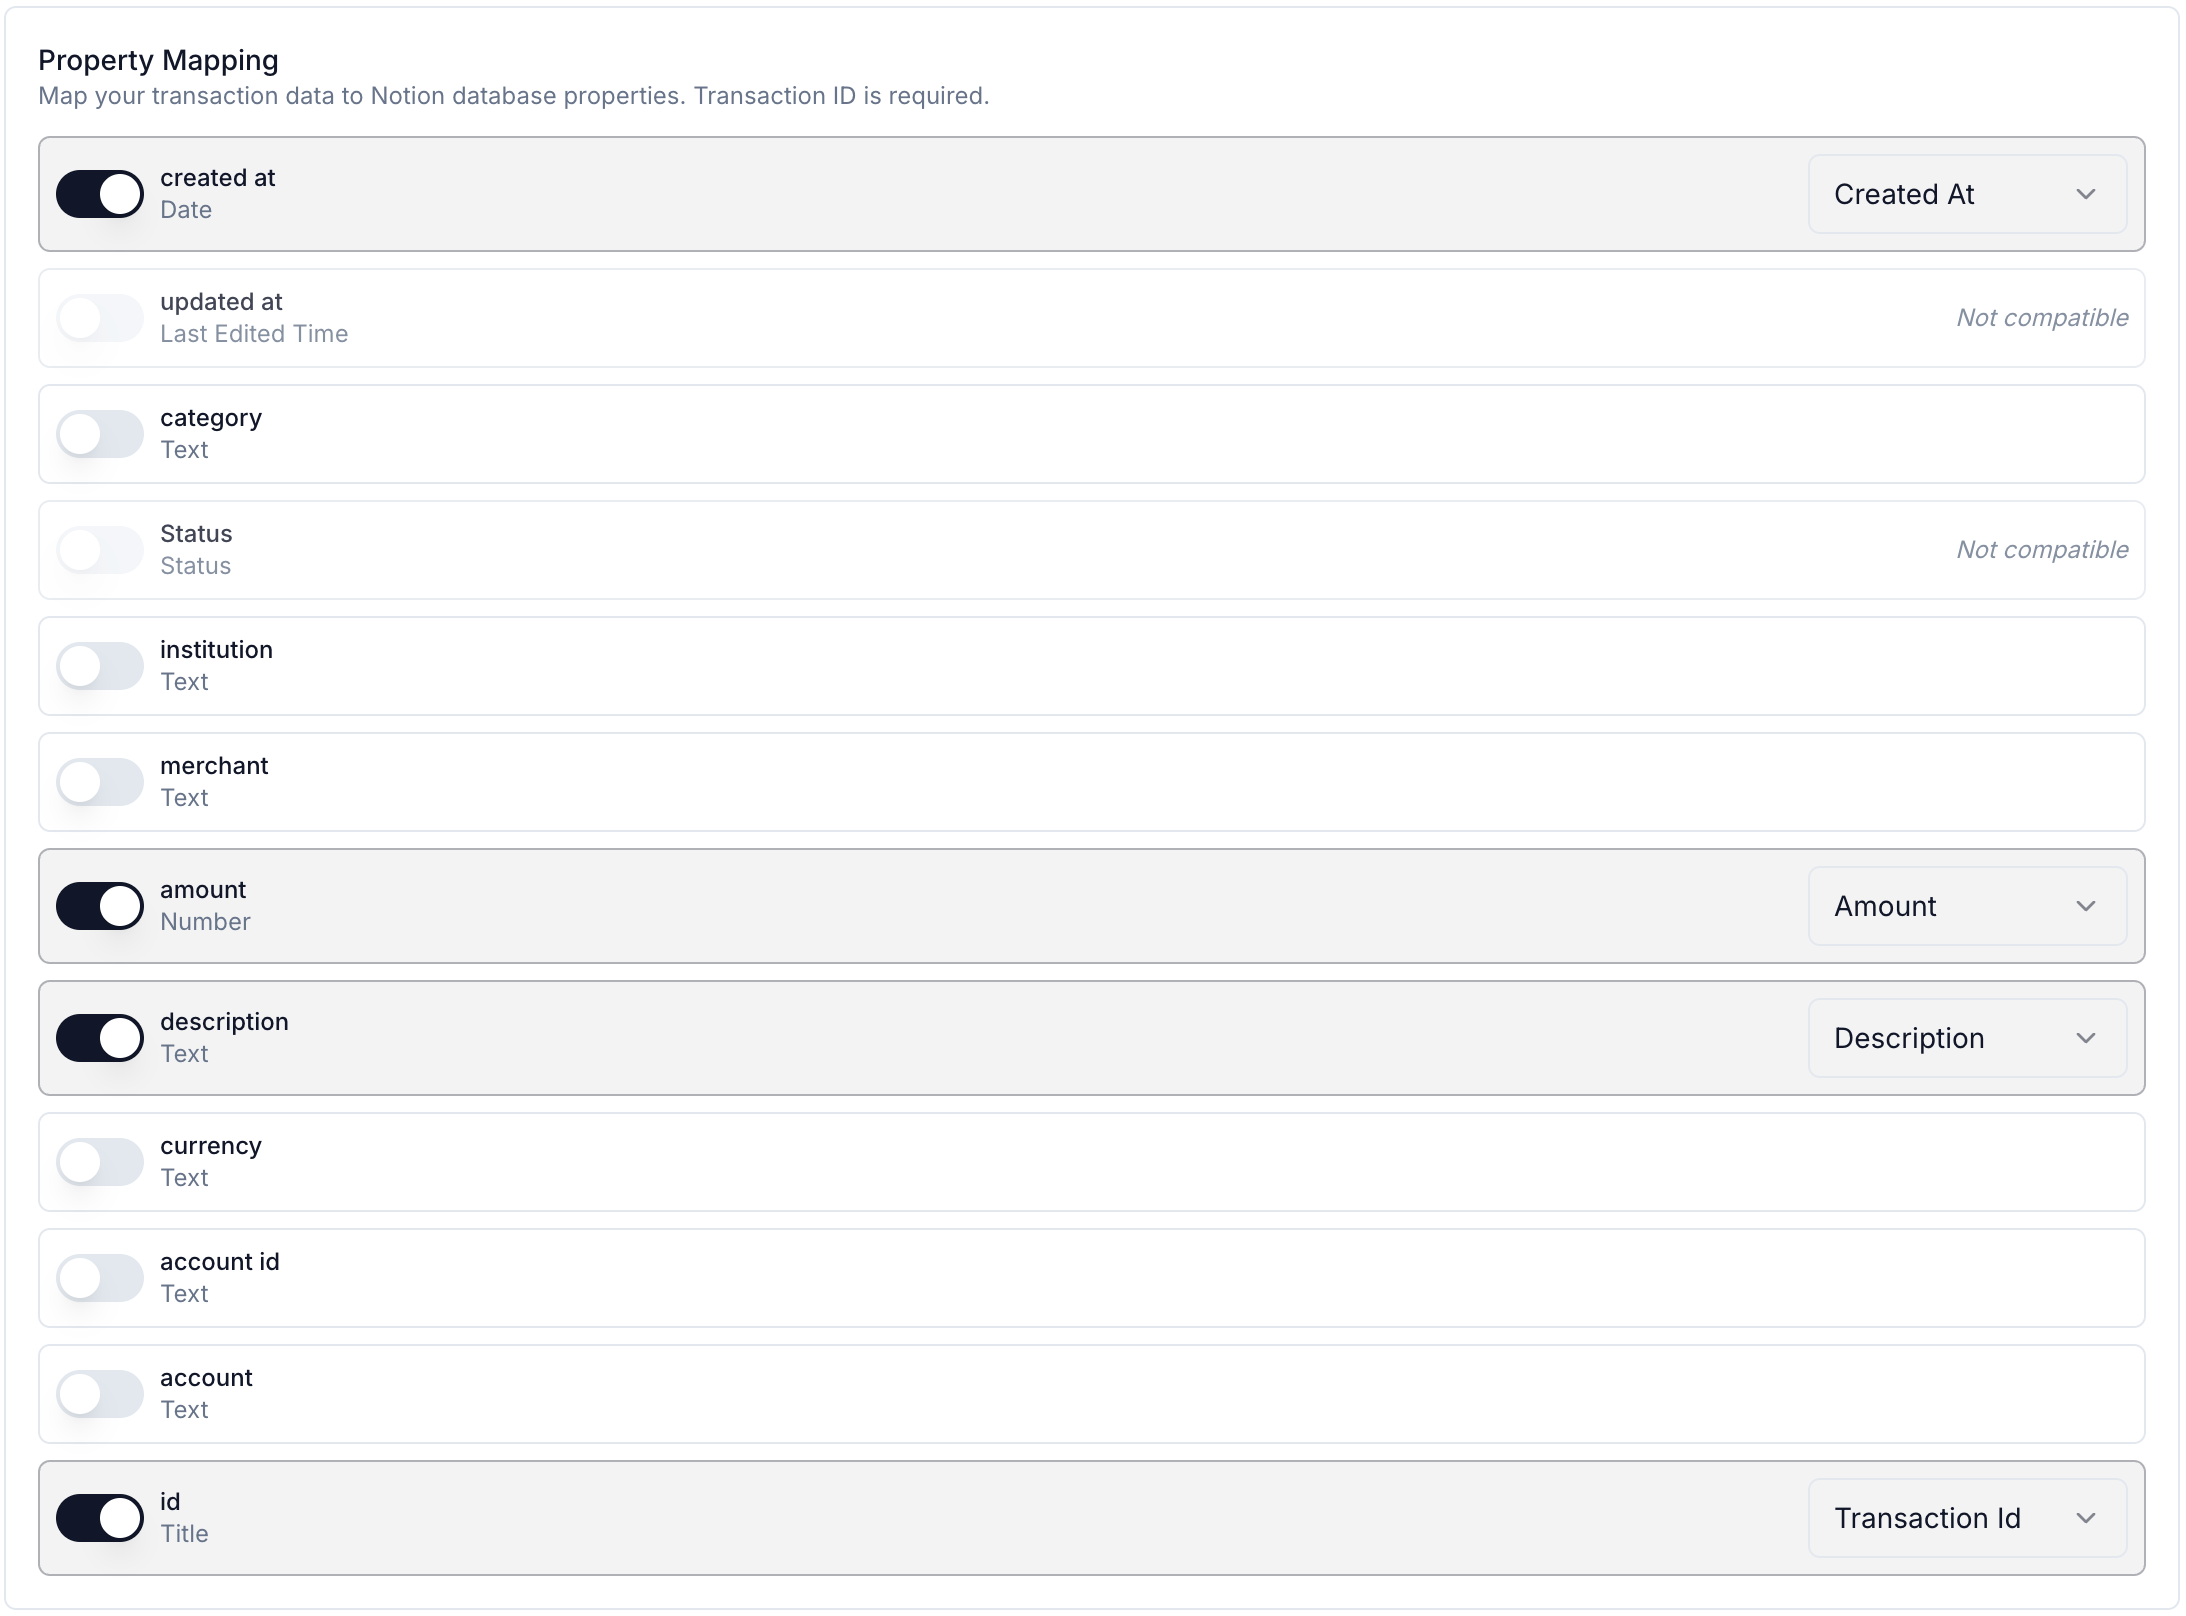
Property Mapping
Finicom allows you to customize which pieces of transaction data are sent to specific Notion database properties so that you can control how your financial data is populated into your Notion database.
Property mappings can be configured when creating a new destination if a mapping is required, or on the destination's configuration page after creation.
Database Properties
If your Notion database has all of the below required properties, names & types, you won't need to manually map Finicom data to Notion properties.
| Property Name | Notion Type | Description |
|---|---|---|
| created at | Date | Date and time when the transaction record was created |
| merchant | Rich Text | Name of the merchant for the transaction |
| description | Rich Text | Details from your financial account related to the transaction |
| amount | Number | Transaction amount in its original currency |
| Status | Status | Transaction state (pending, posted, or void) |
| institution | Rich Text | Name of the financial institution (e.g., "Wells Fargo") |
| category | Rich Text | Category of the transaction (e.g., "Food and Drink: Restaurant") |
| account | Rich Text | Source account name (e.g., "Business Checking") |
| currency | Rich Text | Currency code for the transaction |
| id | Title | Unique identifier for the transaction |
| account id | Rich Text | Unique identifier for your financial account |
| updated at | Date | Date and time when the transaction record was last edited |
You can add extra properties, hide existing ones, or change sorting orders as needed, but the above properties must be present if your Finicom destination does not have a mapping.
If you wish to delete a required property, instead of deleting it, you may use the "Hide in view" option instead.
Check Number
Check numbers are available for check transactions from Plaid and Mercury sources, and are extracted from document uploads when present. This field is not included in the default auto-mapping — to sync check numbers, add a Rich Text or Title property to your Notion database and map it to Check Number in the Property Mapping section.